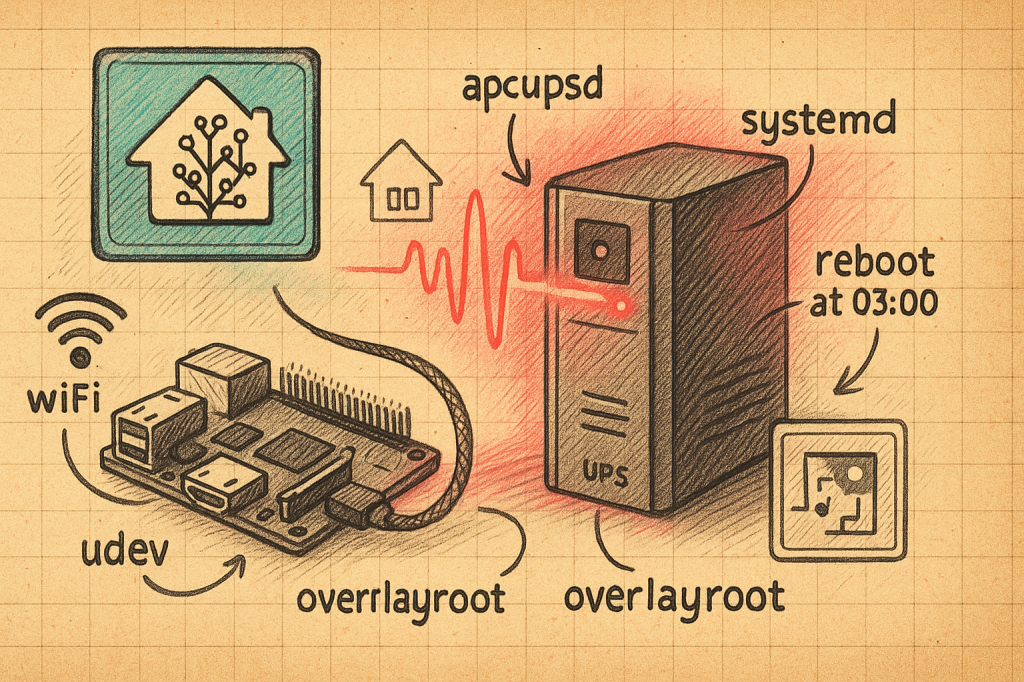
I’m a bit of a Home Assistant fan — everything in my home (yes, even the ceiling fans) is wired into HA.
When I recently upgraded to an APC online UPS — the SRV3KL-IN — it too had to become part of the smart home fold. The plan? Hook up a spare Raspberry Pi 4 to the UPS’s communication port and run the APC UPS Daemon, so HA could keep an eye on it like any other device.
Most Raspberry Pi “UPS monitoring” guides stop at install APCUPSD. Cute. But if your Pi is sitting inside a power-critical environment — running on a micro-SD card, over flaky Wi-Fi — the real problem isn’t installing the daemon. It’s keeping the whole thing alive and clean when the world around it is falling apart.
I wanted my Pi to:
- Keep talking to my APC UPS no matter what.
- Survive mesh Wi-Fi tantrums.
- Recover from software crashes or kernel panics.
- Laugh at power cuts without corrupting its OS.
- Require zero human babysitting.
This post is that recipe. It’s the full set of changes I made to get there. This is going to be a long one.
I started with a fresh install of the latest Raspberry Pi OS Lite (“Bookworm” at the time of writing). I used a Raspberry Pi 4 for this setup, but it should work fine on a Pi 5 and newer models too. If you’re installing Raspberry Pi for the first time, it is simple. Everything is outlined at https://www.raspberrypi.com/documentation/computers/getting-started.html
Install & Configure APCUPSD
To let Home Assistant read your UPS status, you need APCUPSD running on the Pi and connected to your UPS’s comms port.
sudo apt install apcupsd
sudo nano /etc/apcupsd/apcupsd.conf
Edit for your UPS:
Note that my model UPS Model, SRV3KL-IN, needed these additional changes. Your’s may not. Remember to scan through the config file to edit existing values and not create duplicate entries.
UPSCABLE smart
UPSTYPE apcsmart
DEVICE /dev/ups-serial
NISIP 0.0.0.0
NISPORT 3551
Set up a udev rule so the UPS always appears as /dev/ups-serial:
Again, this is important since the USB to Serial connection hops between default TTYUSB0 and TTYUSB1 and, post reboot, can at times just not reconnect apcupsd.
echo 'SUBSYSTEM=="tty", ATTRS{idVendor}=="04e2", ATTRS{idProduct}=="1410", SYMLINK+="ups-serial"' \
  | sudo tee /etc/udev/rules.d/80-ups-serial.rules
sudo udevadm control --reload
sudo udevadm trigger
Verify that you have the UPS working by connecting it to the pi over USB cable and running these commands:
ls -l /dev/ups-serial
apcaccess status
My Home Assistant instance and the APC UPS Monitoring was being done on two separate Raspberry Pis, hence the network shenanigans. If you are installing the UPS in the same Pi that runs your Home Assistant, then you can skip the NIS related stuff.
Make apcuspd wait for network & device
If APCUPSD starts too early — before the UPS is ready or the network is online — it can fail quietly. We’ll delay it until everything is ready.
Use:
sudo systemctl edit apcupsd
Create a systemd override:
(Note how we are also adding some sleep before the restart so that network and other stuff settles.)
[Unit]
Wants=network-online.target
After=network-online.target dev-ups\\x2dserial.device

[Service]
Restart=always
RestartSec=5
ExecStartPre=/bin/sleep 15
Enable NetworkManager’s wait service:
sudo systemctl enable --now NetworkManager-wait-online.service
sudo reboot and then verify everything is running by using systemctl status apcupsd.
Expose it to Home Assistant
Home Assistant talks to apcupsd over the Network Information Server (NIS). We already enabled this using the NIS configs while configuring apcupsd.conf.
In Home Assistant → Settings → Devices & Services → Add Integration → APC UPS Daemon:
- Host: the Pi’s IP (e.g., 192.168.0.21)
- Port: 3551
You should see the UPS entity appear with live metrics.
Note that I used static IP. Pi local domain names do not work reliably. However, since your device’s IP address may change, at this time, I would recommend going to your home router’s settings and reserve the IP address of this raspberry Pi. I would not recommend setting a static IP from inside the Pi since that will prevent reconnection in case of changes to your overall network configuration.
Self-healing Wi-Fi
Wi‑Fi drops happen. A simple script can make the Pi reconnect automatically without intervention and also restart apcupsd so Home Assistant doesn’t get stuck.
The following set of command save a net-recover script to the right location, makes it executable, and wires it up with a systemd service + timer so it runs every minute.
Bookworm Lite ships with NetworkManager by default, so we configure Wi‑Fi directly with nmcli instead of dhcpcd or manually enabling wpa_supplicant. This avoids conflicts and makes reconnects more reliable.
Ensure NetworkManager is active
sudo systemctl disable --now [email protected]
systemctl status NetworkManager || sudo apt install -y network-manager
sudo systemctl enable --now NetworkManager
Create a stubborn Wi‑Fi connection
Replace YOUR_WIFI_SSID and YOUR_WIFI_PASSWORD:
sudo nmcli radio wifi on
sudo nmcli dev status

sudo nmcli con add type wifi ifname wlan0 con-name home ssid "YOUR_WIFI_SSID"
sudo nmcli con modify home wifi-sec.key-mgmt wpa-psk wifi-sec.psk "YOUR_WIFI_PASSWORD"
sudo nmcli con modify home connection.autoconnect yes
sudo nmcli con modify home connection.autoconnect-retries -1   # retry forever
sudo nmcli con modify home ipv6.method ignore                   # optional: reduce IPv6 flakiness
sudo nmcli con up home
(Optional) add a fallback SSID:
sudo nmcli con add type wifi ifname wlan0 con-name backup ssid "SECONDARY_SSID"
sudo nmcli con modify backup wifi-sec.key-mgmt wpa-psk wifi-sec.psk "SECONDARY_PASSWORD"
sudo nmcli con modify backup connection.autoconnect yes connection.autoconnect-priority -10
Add a self-healing watchdog
Create /usr/local/bin/net-recover.sh:
sudo tee /usr/local/bin/net-recover.sh >/dev/null <<'EOF'
#!/bin/bash
set -euo pipefail
TARGET="${1:-8.8.8.8}"
if ! ping -c2 -W2 "$TARGET" >/dev/null 2>&1; then
  echo "[$(date -Is)] Connectivity lost. Nudging NetworkManager…" >&2
  nmcli dev disconnect wlan0 || true
  sleep 2
  nmcli dev wifi rescan || true
  nmcli con up id home || nmcli con up id backup || true
fi
EOF
sudo chmod +x /usr/local/bin/net-recover.sh
Create systemd unit & timer:
sudo tee /etc/systemd/system/net-recover.service >/dev/null <<'EOF'
[Unit]
Description=Recover Wi-Fi if connectivity is lost
After=NetworkManager.service

[Service]
Type=oneshot
ExecStart=/usr/local/bin/net-recover.sh
EOF

sudo tee /etc/systemd/system/net-recover.timer >/dev/null <<'EOF'
[Unit]
Description=Run Wi-Fi recovery every minute

[Timer]
OnBootSec=60s
OnUnitActiveSec=60s
Unit=net-recover.service

[Install]
WantedBy=timers.target
EOF

sudo systemctl daemon-reload
sudo systemctl enable --now net-recover.timer
Sanity check
nmcli -g GENERAL.STATE general status      # 100 means connected
nmcli -g NAME,DEVICE,STATE con show --active
ping -c2 8.8.8.8
Your Pi will now keep trying forever to reconnect to Wi‑Fi and recover automatically from temporary network drops.
Temporarily disconnect Wi‑Fi (nmcli dev disconnect wlan0) and wait a minute. Then check:
Don’t worry if you are already accessing the Pi over SSH. If we did things right, the Pi will reconnect in just above a minute.
journalctl -u net-recover.service -n 20 --no-pager
apcaccess status | sed -n '1,12p'
You should see the wifi reconnect and the recovery logs and a valid UPS status.
Auto-reboot Daily
A scheduled reboot clears up odd states that build up over time. I reboot at 03:00 IST daily.
Create a tiny service and timer like the following script does:
# service
sudo tee /etc/systemd/system/daily-reboot.service >/dev/null <<'EOF'
[Unit]
Description=Daily Reboot

[Service]
Type=oneshot
ExecStart=/sbin/reboot
EOF

# timer
sudo tee /etc/systemd/system/daily-reboot.timer >/dev/null <<'EOF'
[Unit]
Description=Run daily reboot at 03:00 IST

[Timer]
OnCalendar=*-*-* 03:00:00
Persistent=true

[Install]
WantedBy=timers.target
EOF

sudo systemctl daemon-reload
sudo systemctl enable --now daily-reboot.timer

# sanity
systemctl list-timers --all | grep daily-reboot
You can verify this the next day, confirm it ran:
journalctl -u daily-reboot.service --since yesterday
Recover from Kernel Panics & FS Errors
Recover from Kernel Panics & FS Errors
Edit /boot/firmware/cmdline.txt and add:
panic=10 fsck.repair=yes
This reboots 10s after a panic and auto-repairs the filesystem.
Make the OS power-loss proof-ish — lock it down against SD corruption
On a micro‑SD‑based Pi, sudden power loss can corrupt the filesystem and eventually kill the card. The answer: make it effectively read‑only during normal operation so nothing can be half‑written when power dies.
We’ll use overlayroot to layer a temporary RAM disk (tmpfs) over the root filesystem. This means the OS sees itself as writable, but all changes go to RAM and are discarded on reboot. For logs and temp files, we’ll explicitly mount /var/log, /tmp, and /var/tmp on tmpfs too.
sudo apt install overlayroot

echo 'overlayroot=tmpfs' | sudo tee -a /etc/overlayroot.conf

# Mount volatile dirs in RAM
cat <<'EOF' | sudo tee -a /etc/fstab
tmpfs /var/log tmpfs defaults,noatime,nosuid,size=50m 0 0
tmpfs /tmp tmpfs defaults,noatime,nosuid,size=100m 0 0
tmpfs /var/tmp tmpfs defaults,noatime,nosuid,size=50m 0 0
EOF

# Apply changes
sudo update-initramfs -u
Reboot and check with mount | grep tmpfs — /var/log, /tmp, /var/tmp should all be tmpfs, and overlayroot should be active. Any change you make to /etc or elsewhere should disappear on reboot.
The End Result
The Pi now:
- Talks to the UPS over a stable device name.
- Starts only when hardware & network are ready.
- Recovers Wi-Fi and restarts services without me.
- Auto-reboots daily and after kernel panics.
- Runs entirely read-only — zero SD wear, zero corruption.
If mine ever stops working, I’ll eat the SD card.


Leave a comment